Optimize your Designer Landing Page for better search and SEO
The purpose of gosadi is to save you time not just in ecommerce management, but in how you grow your customer base by directing people to you, to your website, to your products, to your Selling Channels, to your socials… to your everything! gosadi’s mission is to save you time and help get your brand and products in front of the people looking for them.
In order for gosadi to work its magic, you’ll have to feed it your best, most optimized information starting with your DLP Profile.
Optimize your DLP
Your Designer Landing Page (DLP) is a powerful and robust feature on gosadi that showcases your brand and your offerings to a wide audience. Because it acts as a digital landing page for you and your patterns, you’ll want it to reflect your full and complete brand identity.
With an optimized DLP working on your behalf, anyone searching either gosadi or the internet's search engines will find you much easier and faster.
A well-optimized DLP contains six key pieces of information.
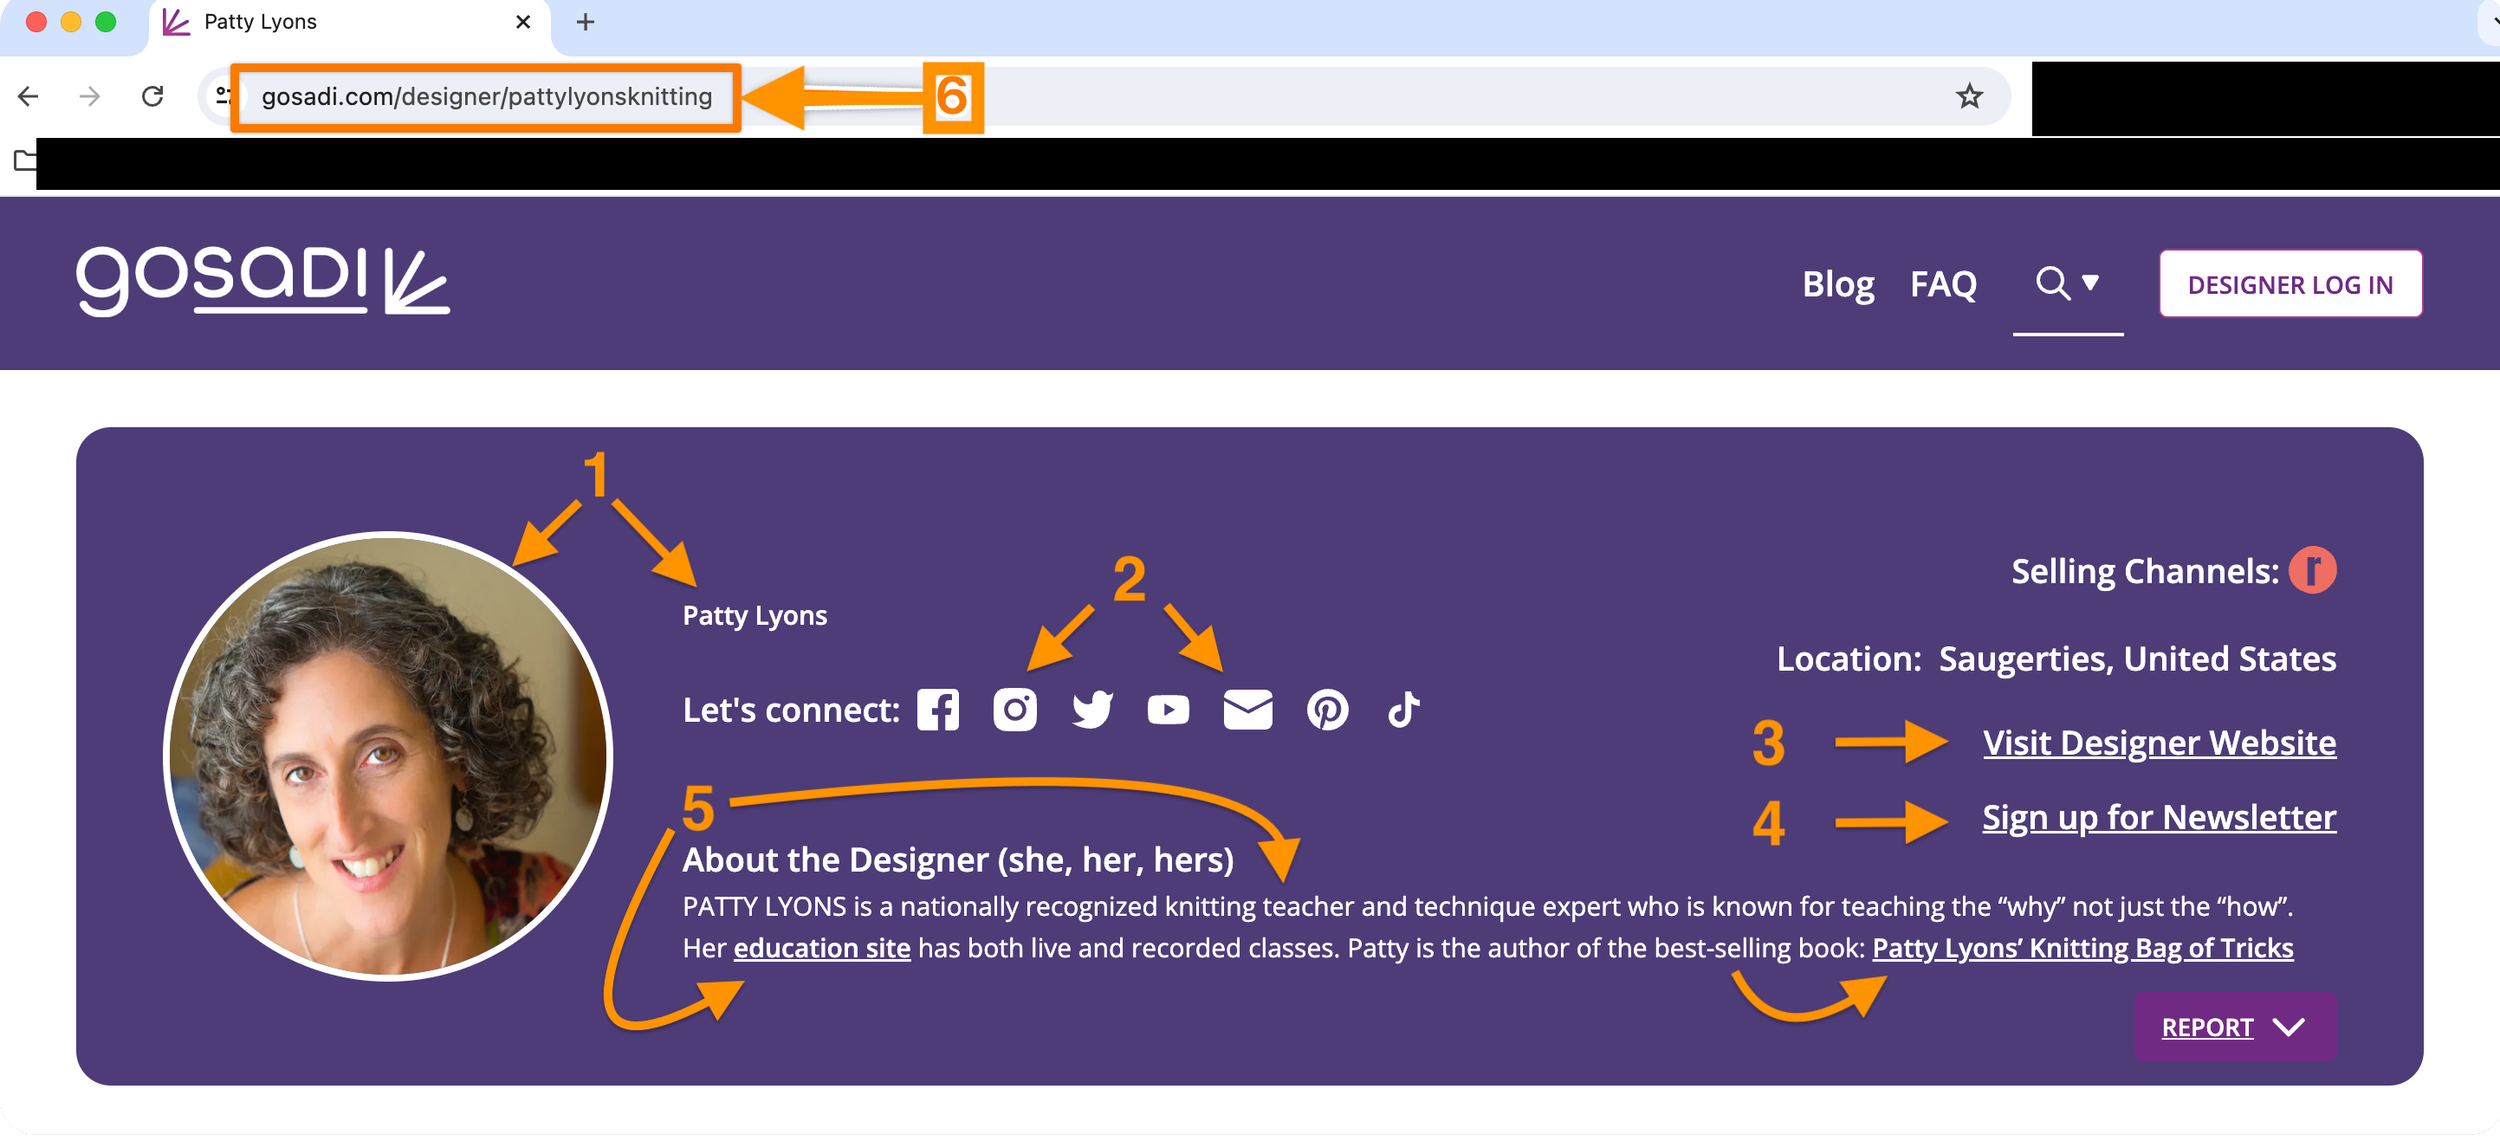
Profile photo + Designer name + Brand name
Social links & Contact Email
Website
Newsletter
Bio / About
Optimized URL
Add a Profile Photo, Designer, and Brand
Navigate to DLP Profile in the panel
Upload a profile picture
Upload a logo

Note: Uploading a logo is important, since it will show up on your products’ pages under “Available on” when you put a link to a website on the pattern page at the top of the DLP selling channel tab. Without a logo, there’ll be an empty box which doesn’t tell customers who you are or where they’re going when they click “get it here”.

Add Social Links
Scroll down to the Social Links section of your Designer Page Profile
Click on Add Social Links

Add your links
Scroll down to the bottom and click Save Changes

Add an email for your business (Note: this can be your email, a general inbox, an assistant’s email, a support email, etc.)

Add your website
Add your newsletter

Add your bio in the About Me section

Finally, add your company’s slug to optimize your URL

Other helpful DLP tips
What is DLP
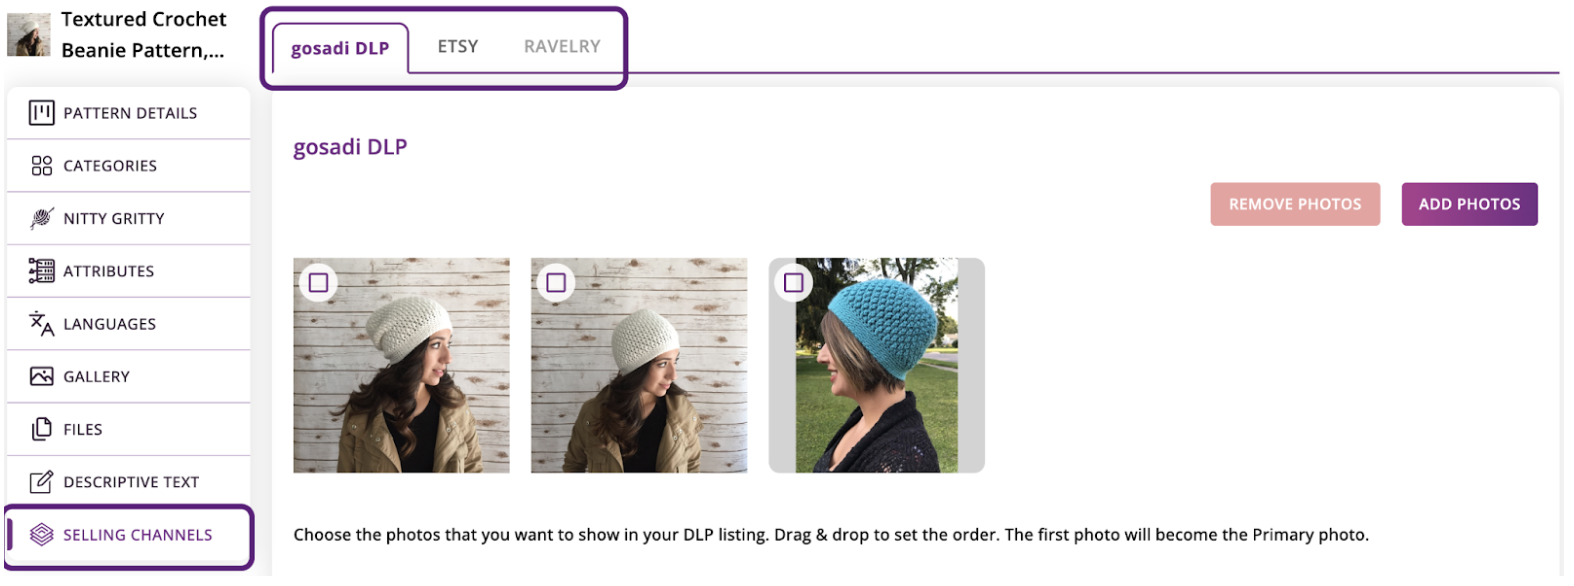
Managing Patterns on your DLP
Hiding DLP vs Hiding Patterns